This page is also available in: Italiano (Italian)
How to access your AltaPEC WebMail inbox
How to Add a new contact to your AltaPEC WebMail contact book
AltaPEC WebMail Characteristics and Usage
How to create and send a new PEC message using AltaPEC WebMail
How to create a Contact Group in your AltaPEC WebMail Contact Book
How to manage your AltaPEC WebMail inbox
How to import a .csv contact book on your AltaPEC WebMail inbox
How to access your AltaPEC WebMail inbox
AltaPEC (throughout Aruba) provides to our PEC users a web interface created to enable the PEC users to access their PEC inboxes online from anywhere.
The AltaPEC WebMail Service actually enables the user to:
– receive, send and forward PEC messages;
– attach one or more files into the same e-mail;
– manage contact and address book;
– manage the PEC inbox and all feature services…
… having access from ANYWHERE in the World (as long as there is an internet connection)!
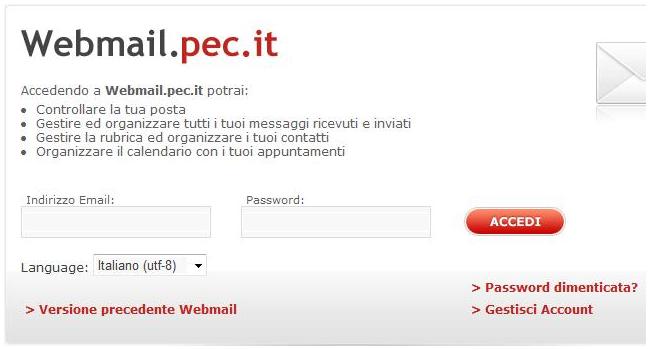
You can access your AltaPEC WebMail by clicking the link – AltaPEC WebMail – or typing the feature address: https://webmail.pec.it/
To access your AltaPEC WebMail inbox you’ll need:
– to enter your PEC address
– to enter the password related to the PEC account
– to click on “Accedi”
How to Add a new contact to your AltaPEC WebMail contact book
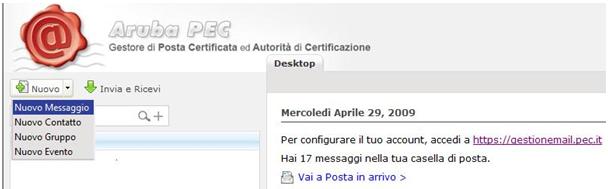
To add a new contact to your contact book, after having accessed your AltaPEC WebMail inbox, you can simply click on “Nuovo Contatto” as demonstrated below:
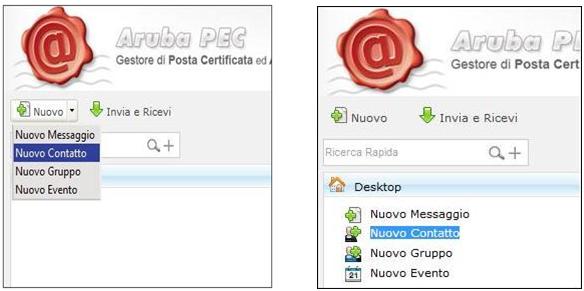
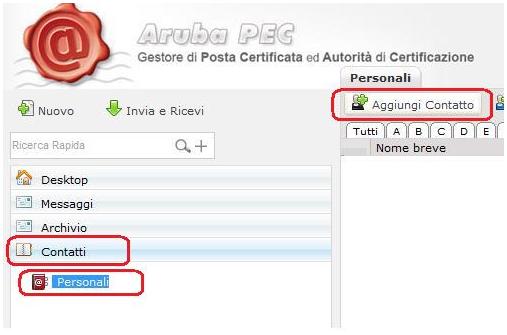
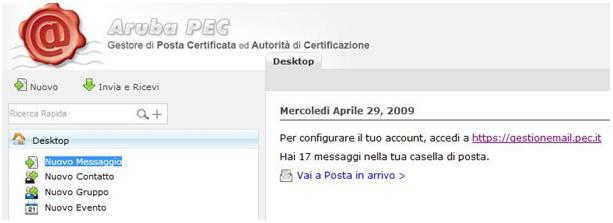
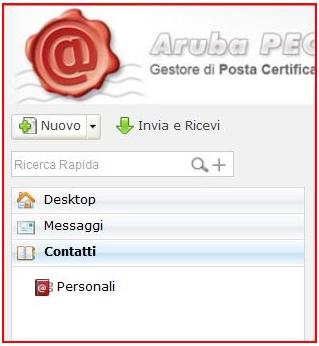
You can also open the Contatti menu, click on Personali and select “Aggiungi Contatto” at the lateral menu.
Doing so, WebMail will open the following window where you can enter the data related to the new contact to be added to your contact book:
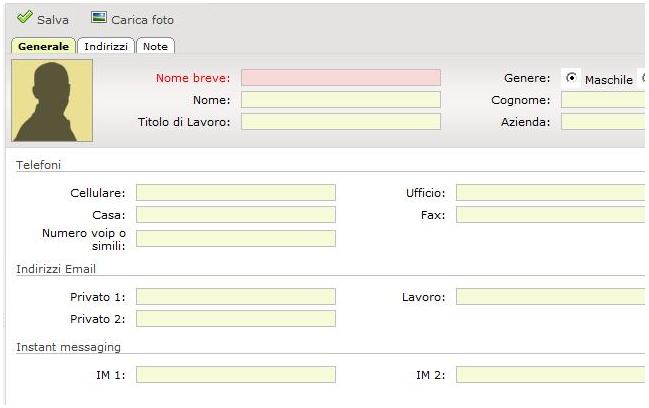
After having entered the data, it will be possible to save a new contact by clicking on “Salva”.
If you want to add more information related to the contact you can also click on the link “Indirizzi e Note” and add more information by clicking “Carica Foto (to upload a picture)… and so on.

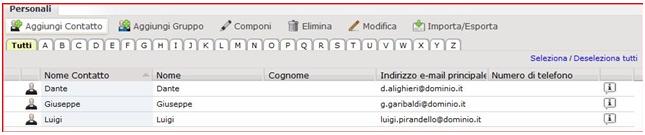
After having entered all the desired contact information the new contact will be displayed as demonstrated below:
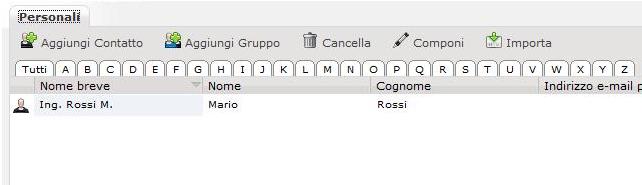
To search for an existing contact, you can click on the alphabet letter and view all your contacts on your contact book.
For more information regarding adding a new contact to your contact book you can download the Guida Filmata.
AltaPEC WebMail Characteristics and Usage
After having accessed your AltaPEC WebMail inbox you can:
– read and manage your electronic messages
– manage and configure your own settings
– add new contacts and manage your contact book
– add a new event or appointment to your calendar… etc…
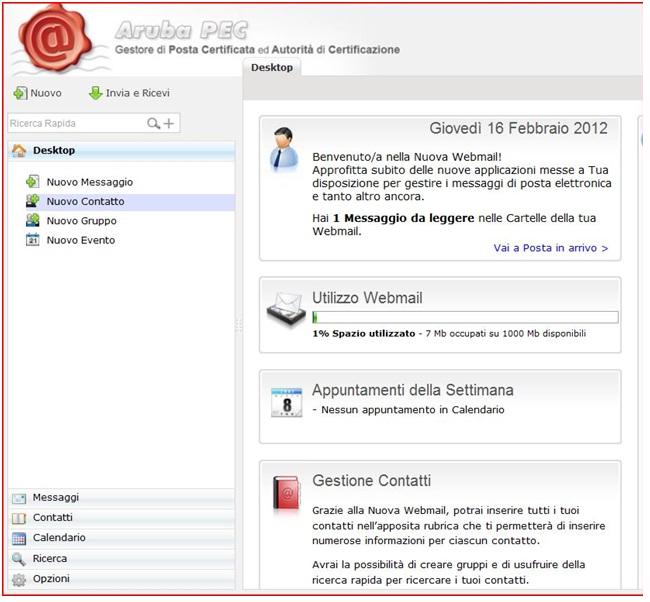
In fact, from the login screen, you can manage multiple applications available to the AltaPEC users.

By accessing the Menu on the left side of the screen you can:
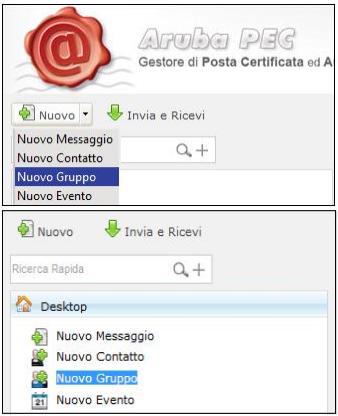
– access Desktop menu: where you can find most of the main features of your AltaPEC WebMail inbox, such as:
– New Message (to write a new email message)
– New Contact (to add a new contact to your contact book)
– New Group (to create a new contact group)
– New Event (to add a new event/appointment to your personal calendar)
– access Message menu: where all email folders are hold, such as:
– Inbox
– Draft messages
– Trash
– Sent messages
– Junk messages
*It is possibile to add, modify, rename and manage your inbox folders inside the WebMail interface.
– access Archive menu (only available for AltaPEC PRO and PREMIUM users): where you can access the folders:
– Inbox
– MESS_CERT
– Ric_accettazione
– Ric_consegna
– access Contact Book menu: where you can manage your contact lists. In this section you will be able to:
– add, modify and erase contacts from your contact book
– create and organise contact groups
– import contacts from other contacts books, etc…
– access Calendar menu: in this section you can manage your personal calendar by:
– adding a new event or appointment
– adding a new meeting event
– setup calendar reminders… etc…
– access the Search menu: in this section you can search for one or more messages inside the several inbox folders based on the criteria that you can choose from the WebMail interface.
– access Option menu: within this section you’ll be presented with the following options:
– Firma (signature): where you can add one or more signatures to be inserted in your PEC messages to be sent
– Visualizzazione (display): where you can set up the columns you want to display inside your Contact menu
– Preferences: where you can manage your AltaPEC WebMail settings, such as: Displayed Sender’s Name, webmail refresh time, automatic logout in case of inactivity, webmail TimeZone, message forwarding mode, etc…
– Folder Manager: allows the webmail user to view the status of the message’s folders and its message statistics (number of inbox messages, number of non-read messages, etc…)
How to create and send a new PEC message using AltaPEC WebMail
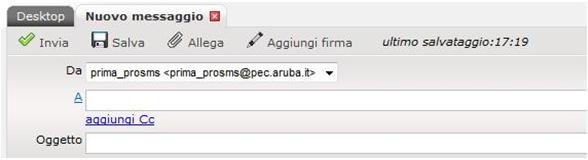
In order to create and sent new PEC messages you will have to access your AltaPEC Webmail and click on Nuovo Messaggio (new message) button as illustrated below:
Or you can click on:
The compose message window will appear. Then you will be able to:
– Add receivers addresses
– Add CC: to add possible receivers to receive a copy of the message
– Subject: to add the subject of the message you want to send
– Options: where you can setup the message priority High Priority – Confidential and the kind of receipt related to the message (wether Brief or Synthetic)
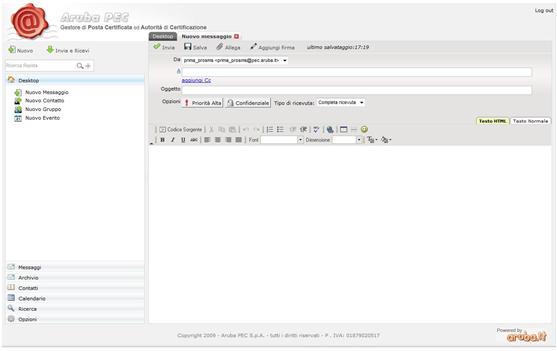
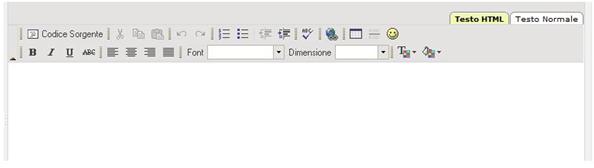
In the section dedicated to email text itself you can:
– Select HTML Text: you can write and edit your message’s formatting (text colours, text fonts, adding emotion, etc…)
– Select Text: you can write without any formatting
After composing a new message it is possible to:
– send the message
– save the message into a folder
– attach one or more files
– add your signature to the text
For more information regarding composing, creating and sending a new message, please access the Guida Filmata.
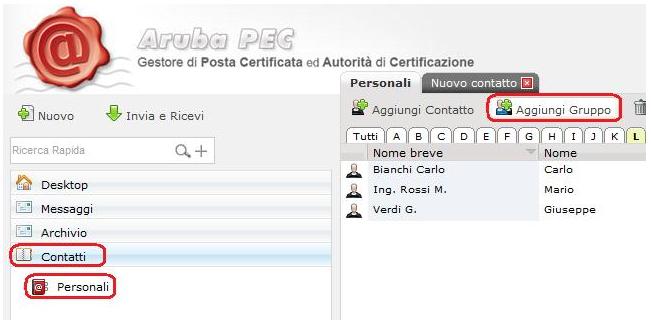
How to create a Contact Group in your AltaPEC WebMail Contact Book
In order to add a new contact group to your contact book you can simply click on “Nuovo Gruppo” (new group) as illustrated below:
You can also open the Contact Menu by clicking on “Personali” in the tab “arguing gruppo” (add group)
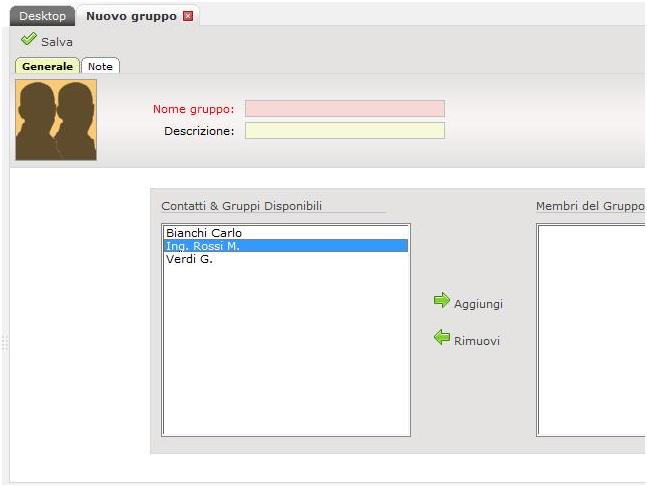
A new window will be opened where you can add the new group:
You can simply add Nome Gruppo (Group Name), Description and add a new group to your contact book by clicking “salva”.
After having entered the new contact group, you will be able to view it on your contact list.
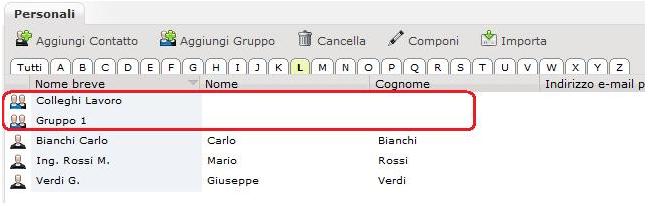
To search a group inside your contact book you can simply click on the alphabetic letter and view all your contacts and groups.
For more information regarding creating a new contact group, please access the Guida Filmata.
How to manage your AltaPEC WebMail inbox
In order to manage your AltaPEC WebMail inbox on the webmail interface, after having logged in, you can open the Message menu:
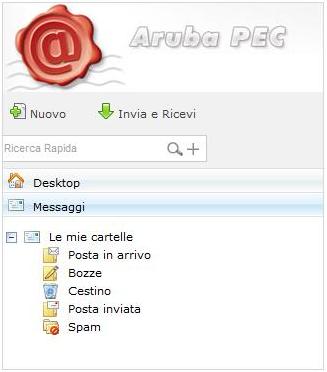
In this section the following folders will be displayed:
– Inbox messages
– Draft messages
– Trash
– Sent messages
– Junk messages (Spam)
You can also create, rename and erase the content of the folders.
How to create a new folder:
– place your mouse on “Le mie cartelle” (my folders)
– right button click on top of “Le mie cartelle” (my folders)
– click on “Crea Cartella” (create folder)
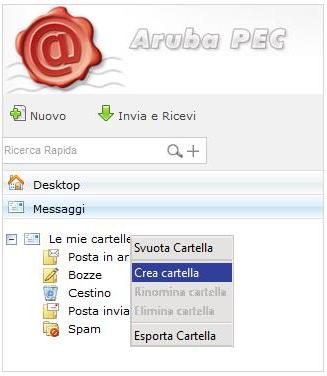
– enter the folder’s name
– select “crea” (create)
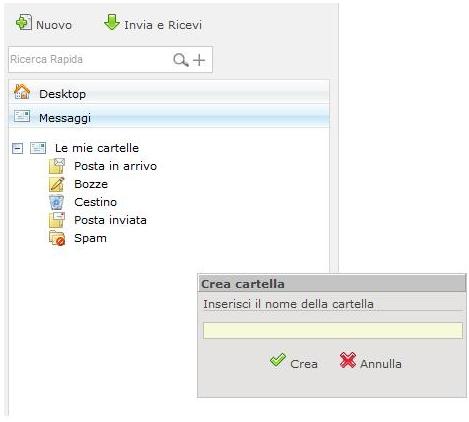
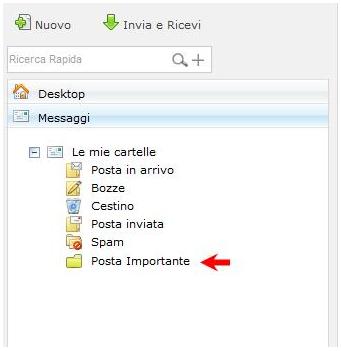
After following this steps, your new folder will be displayed inside your WebMail interface.
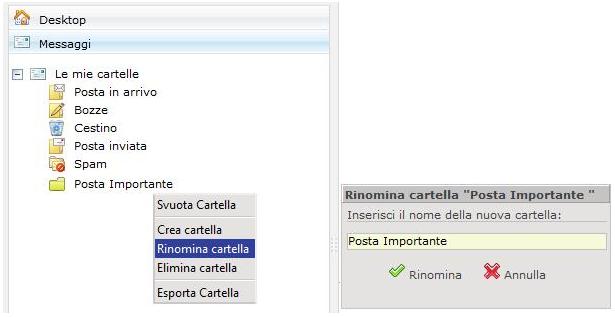
How to rename an existing folder:
– place your mouse on the folder you want to rename
– right button click on top of “Le mie cartelle” (my folders)
– click on “Rinomina cartella” (rename folder)
– enter the new folder’s name
How to erase an existing folder:
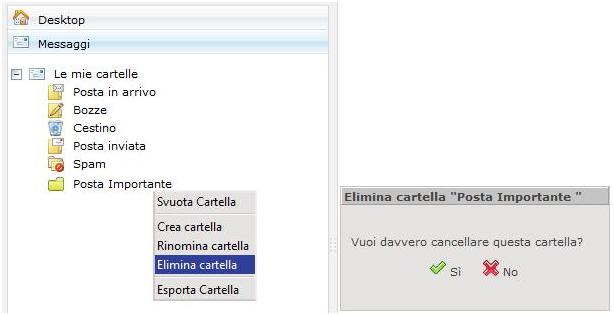
– place your mouse on the folder you want to erase
– right button click on top of “Le mie cartelle” (my folders)
– click on “Elimina cartella” (erase folder)
– click on the green button to confirm
For more information regarding managing folders on your AltaPEC WebMail inbox, please access the Guide Filmate.
How to import a .csv contact book on your AltaPEC WebMail inbox
Access and log in your WebMail: https://www.altapec.it/webmail
Select the Contact Menu
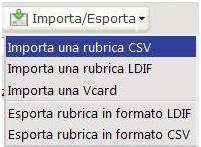
From the dropdown, click on “Importa una rubrica CSV” (Import a CSV contact book)
On the next screen, select the set of the CSV file and then click on “Importa” (import)
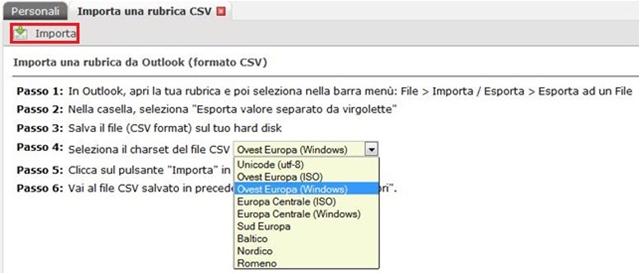
Then upload the CSV file you want to import.
A new screen will be displayed where you will be able to see the all data to be imported.

Then you can click on “Prova Importazione – Europa Centrale Windows”
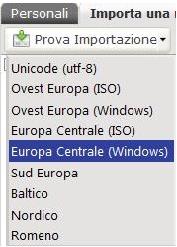
and the importation will automatically start.